Introduction
These instructions are for Windows.
During these installation and configuration steps, a database and administration accounts will be created. Be sure to write down the information. It will be used when installing WordPress.
Step 1. Download the XAMPP installer
Dowload the latest installer
from
here  .
.
Step 2. Follow the XAMPP installation instruction on the website
Install in C:\xampp
Step 3. Configure XAMPP for WordPress
The following steps use the XAMPP console to:
2. Create a MySQL database for WordPress
3. Create an administrator account for the WordPress database
Note: The administrator account should only have access to the WordPress database
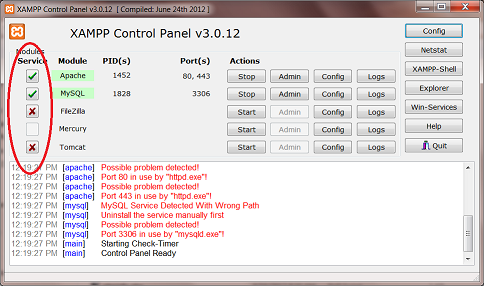
Step 3.1 Make Apache and MySQL Windows services
Click on the red X and make Apache and MySQL servces.
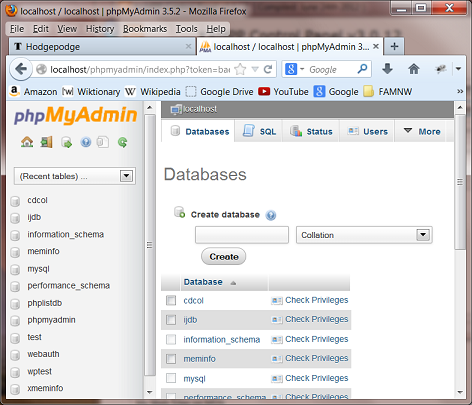
Step 3.2 Create a MySQL database for WordPress
1. Click on the MySQL Admin button.
2. Select the Databases tab.
3. Enter a name for the database. For example "mywordpress", or "test", or .....
(use lowercase to keep it simple)
4. Click on "Create".
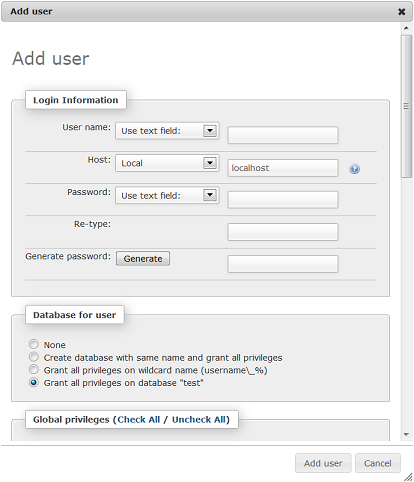
Step 3.3 Create an administrator account for the WordPress database
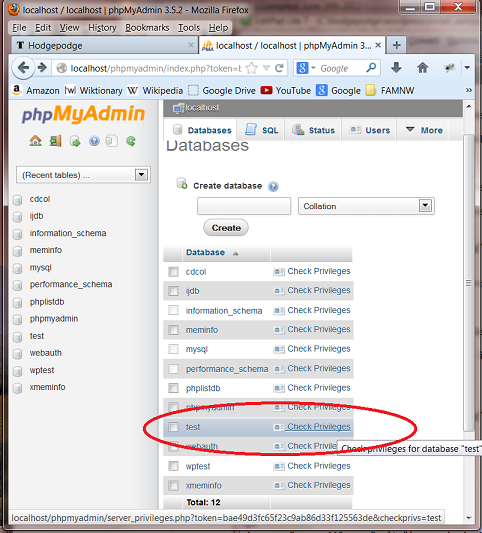
1. Select the Database tab.
2. Click on "Check Privileges" for the database.
3. Select "Add user".
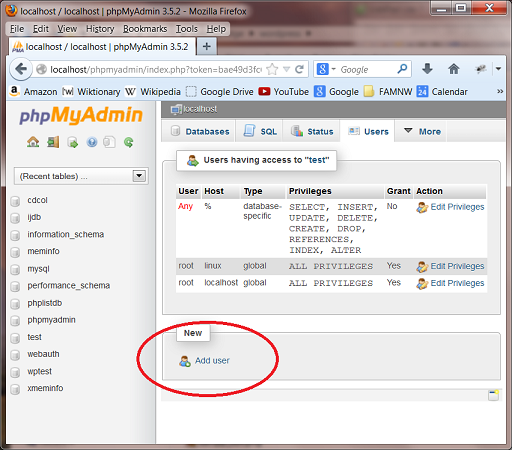
4. Enter a Username.
5. Select "local".
6. Enter a Password.
7. Grant all privileges on the WordPress database.
8. Click on "Add User".